The Head and the Heart – See You Through My Eyes (Official Music Video) – VFX
October 17, 2019
Skeksis Chamberlain Puppet – The Head – Part 2
October 18, 2019
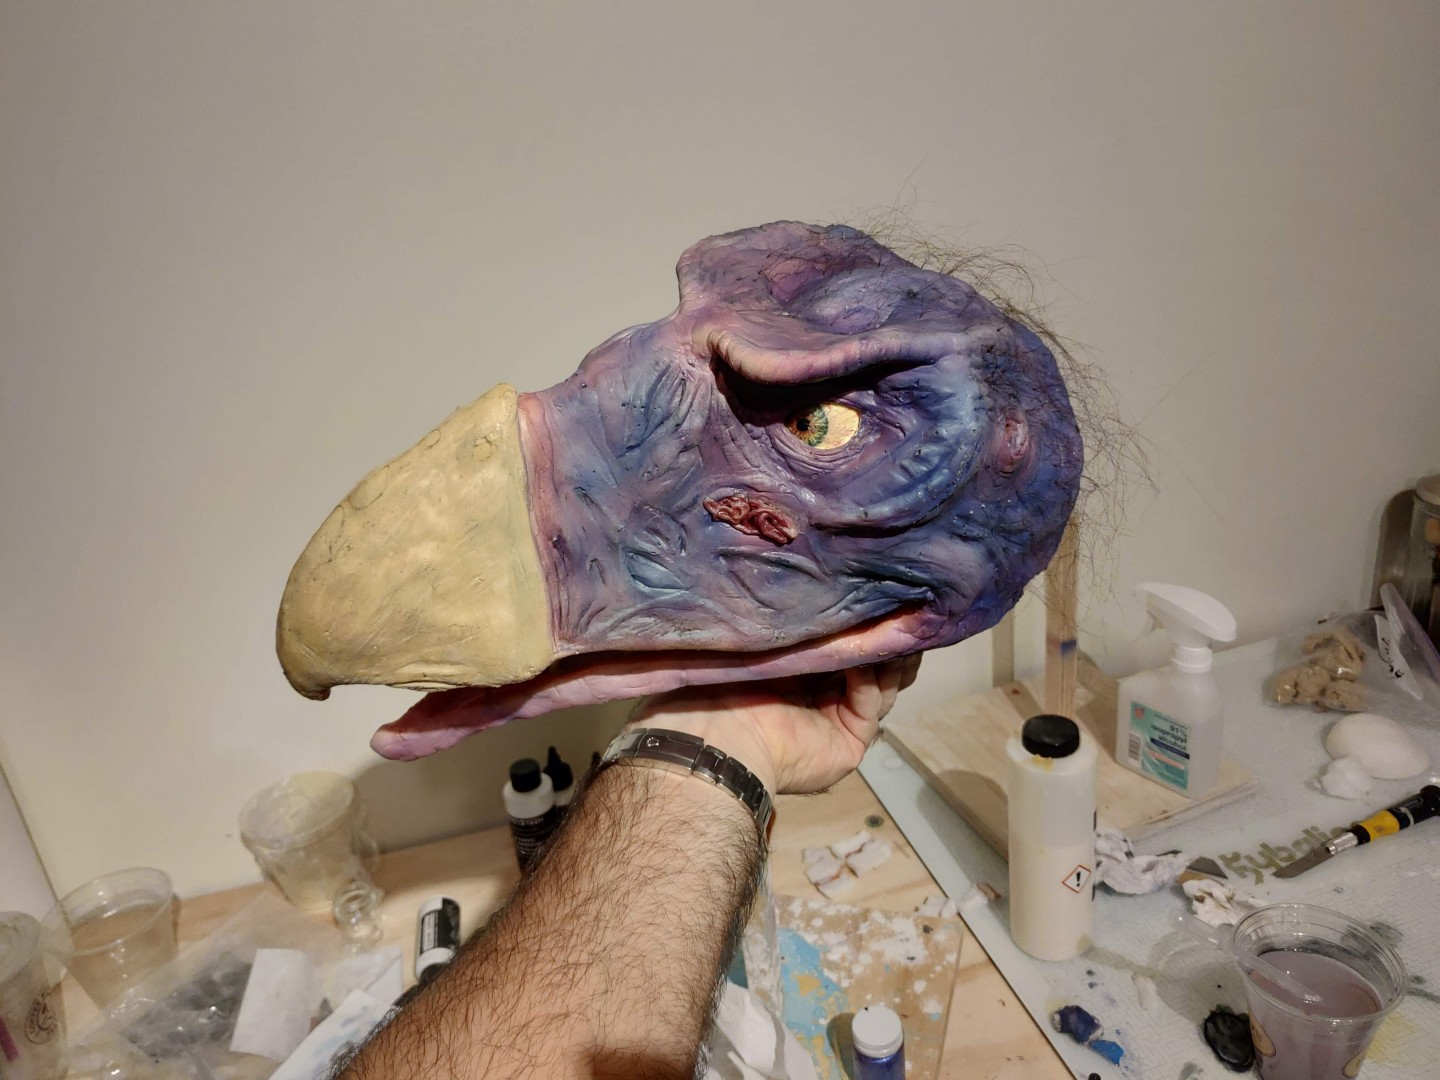
The Skeksil Project
I started this project for 2 reasons:
1. My 3-year-old daughter loves Skeksil.
2. I love Skeksil.
I did a 3D model for fun and when she saw it, she lost her mind. I moved the camera in Blender to make it look like it was moving the head and talking and she started having a full-blown conversation (in her own little language) with "Keksi". I knew a puppet would make her lose it completely, so that was the spark.
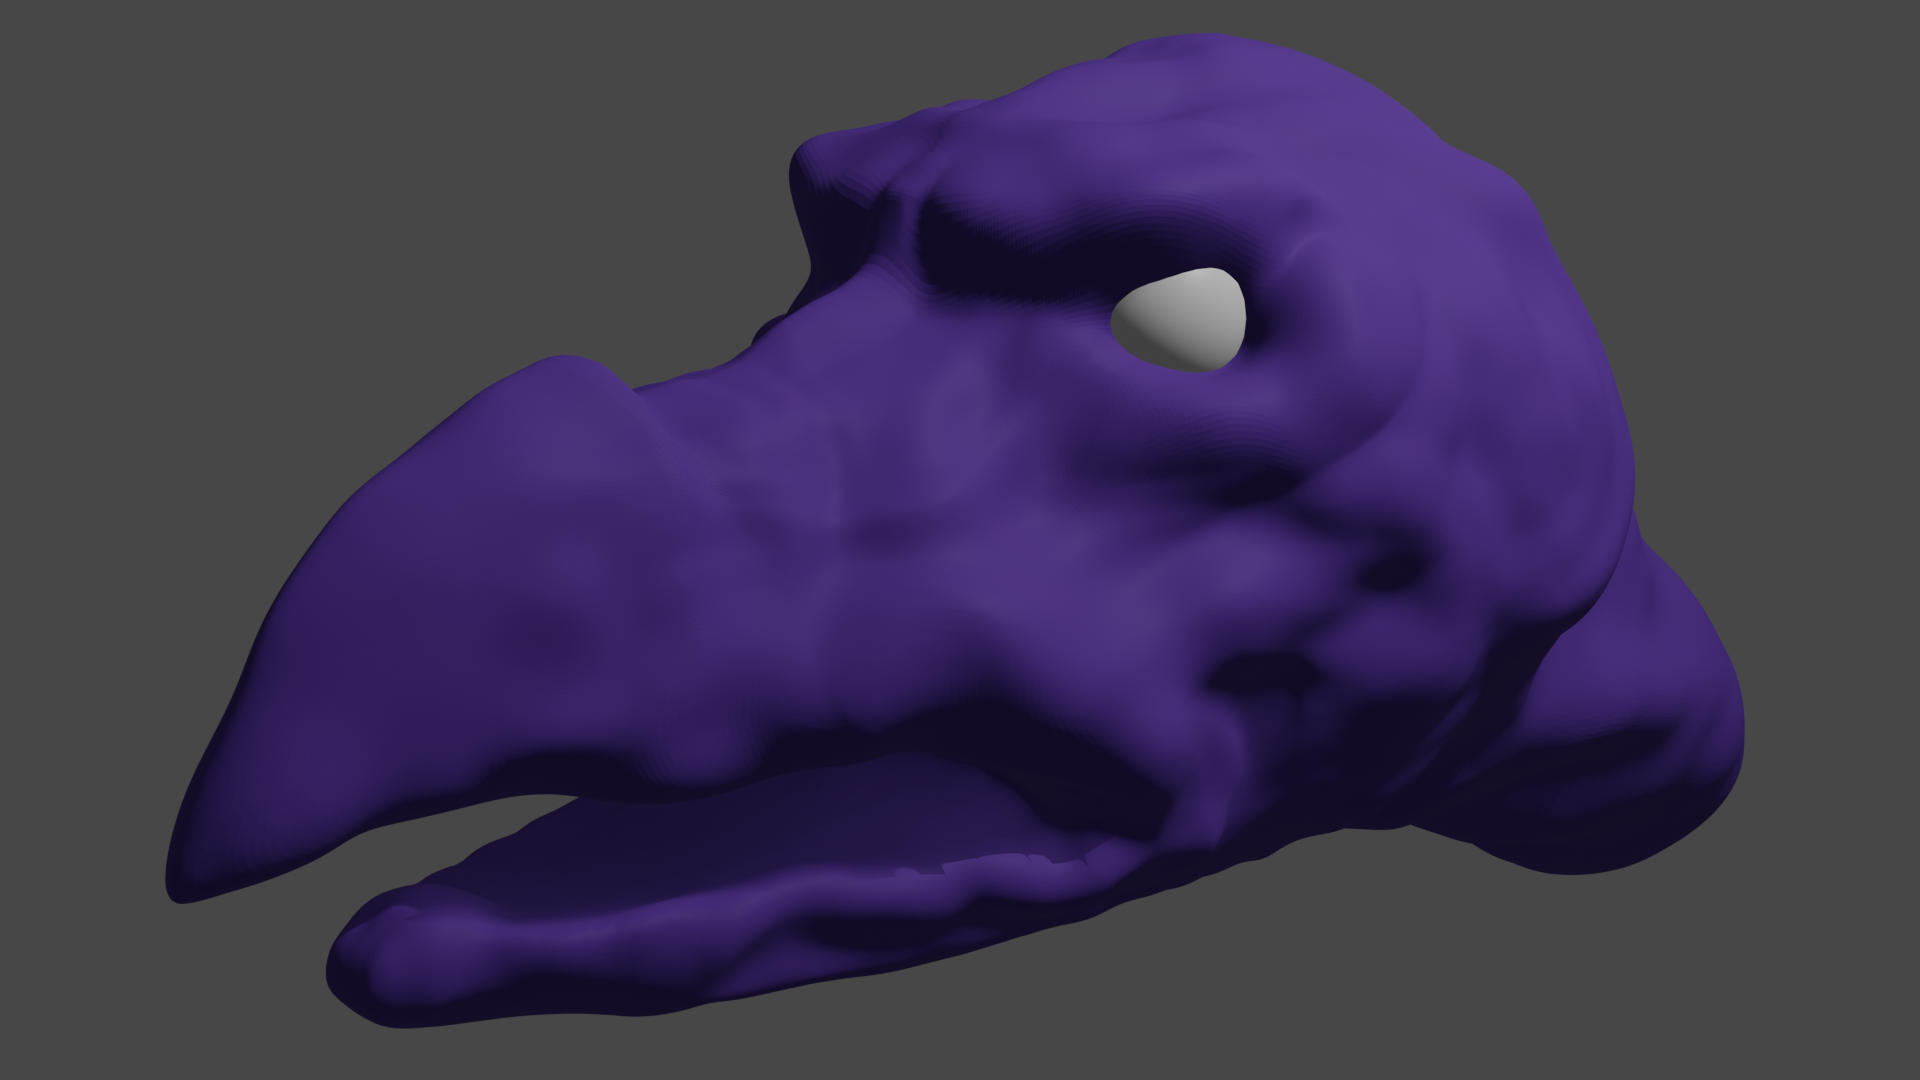
Unfinished model on Blender 3D. Inadvertently, this gave me an idea of the geometry and features in the future sculpture.
I've done some Special Fx for a couple of filmschool shorts when I was studying, 10 years ago. I was the ToGo guy in my class for these kind of things. A severed hand, a gargoyle, a hand for stabbing with bleeding action (I cast a hand and inserted a condom full of blood inside), a head to be scalped...
Pretty rough stuff. But I had passion. I've always had a passion for SFX and puppets.
So if I can do this with such poor piss experience, I believe anyone can.
Here's the disclaimer though: It was not cheap. There might be a way of making cheaper choices -and I'll point them out when the time comes- but I went the sure tested and expensive route. I was anticipating spending way less.
My total budget, pretty much from scratch was about $600. If you own some of the stuff that will be built or acquired, you might be able to cut it down to ~$300
The armature
I don't have much detail on this as doing this posts was almost an afterthought.
I started cutting up floor foam (cheap EVA foam) I saved from when my daughter was a newborn and we were making a safe area for her to play without fear of concussions.
These are a paid links.
It's cheaper than other EVA foam sources and you can use the leftovers as mats! It's a win-win. The downside is they have a pattern that is very hard to sand down completely. To remove the pattern I used a heat gun to reduce the pattern a bit and also hardens the surface, making it easier to sand.
And for the sanding and refining of the shape I used a rotary tool, which I had to purchase because my Dremel had vanished. That being said, I found the set by Wen to be plenty affordable and a really complete set. I had no flex shaft on my previous one, so this was quite an upgrade.
Cut the foam as best as you can. Unfortunately, I don't have templates as I eyeballed it quite a bit. The concept is to cut "darts" (incisions roughly shaped like a V on the areas you want to achieve curvature. When creating a straight seam where you want some kind of curvature, you cut the edges on an angle.
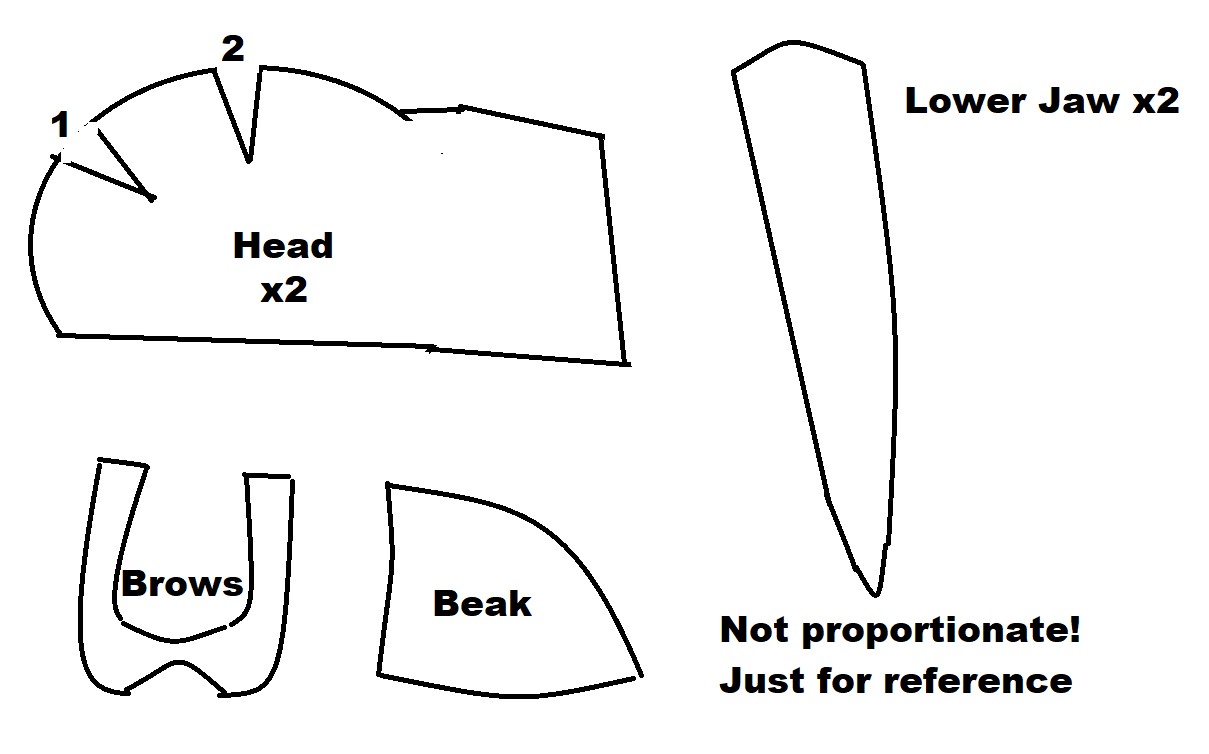
Cutting similar pieces to these ones, you have to make sure to cut and glue, first, the darts so you get the approximated half you are trying to make. Fiddle with the dart angle and width until you get your shape. If you went too wide, you can trim from the top of the head or you can add some scrap foam into the dart.
For glue, I used contact cement and for this early stage, preferably with toluene. Toluene is nasty and fairly toxic so use it in well-ventilated areas or preferably outdoors.
The reason I go with toluene glue was because it dries fast and allows me to see results almost immediately so I can adjust before it's completely cured without wasting too much time.
Contact cement is first applied on both areas to be glued together, let dry and then attach. The newer stuff doesn't have toluene and is less toxic. but you have to wait between 20 min and and hour to put them together as it doesn't dry as fast.
At first I used the toluene stuff, but as I moved into more detailed gluing and needed to be indoors, I started using a new proprietary latex-based glue that Jeff from http://www.motionpicturefx.com let me try and you can already buy here. Keep that website in your bookmarks because most of the supplies will be coming from there.
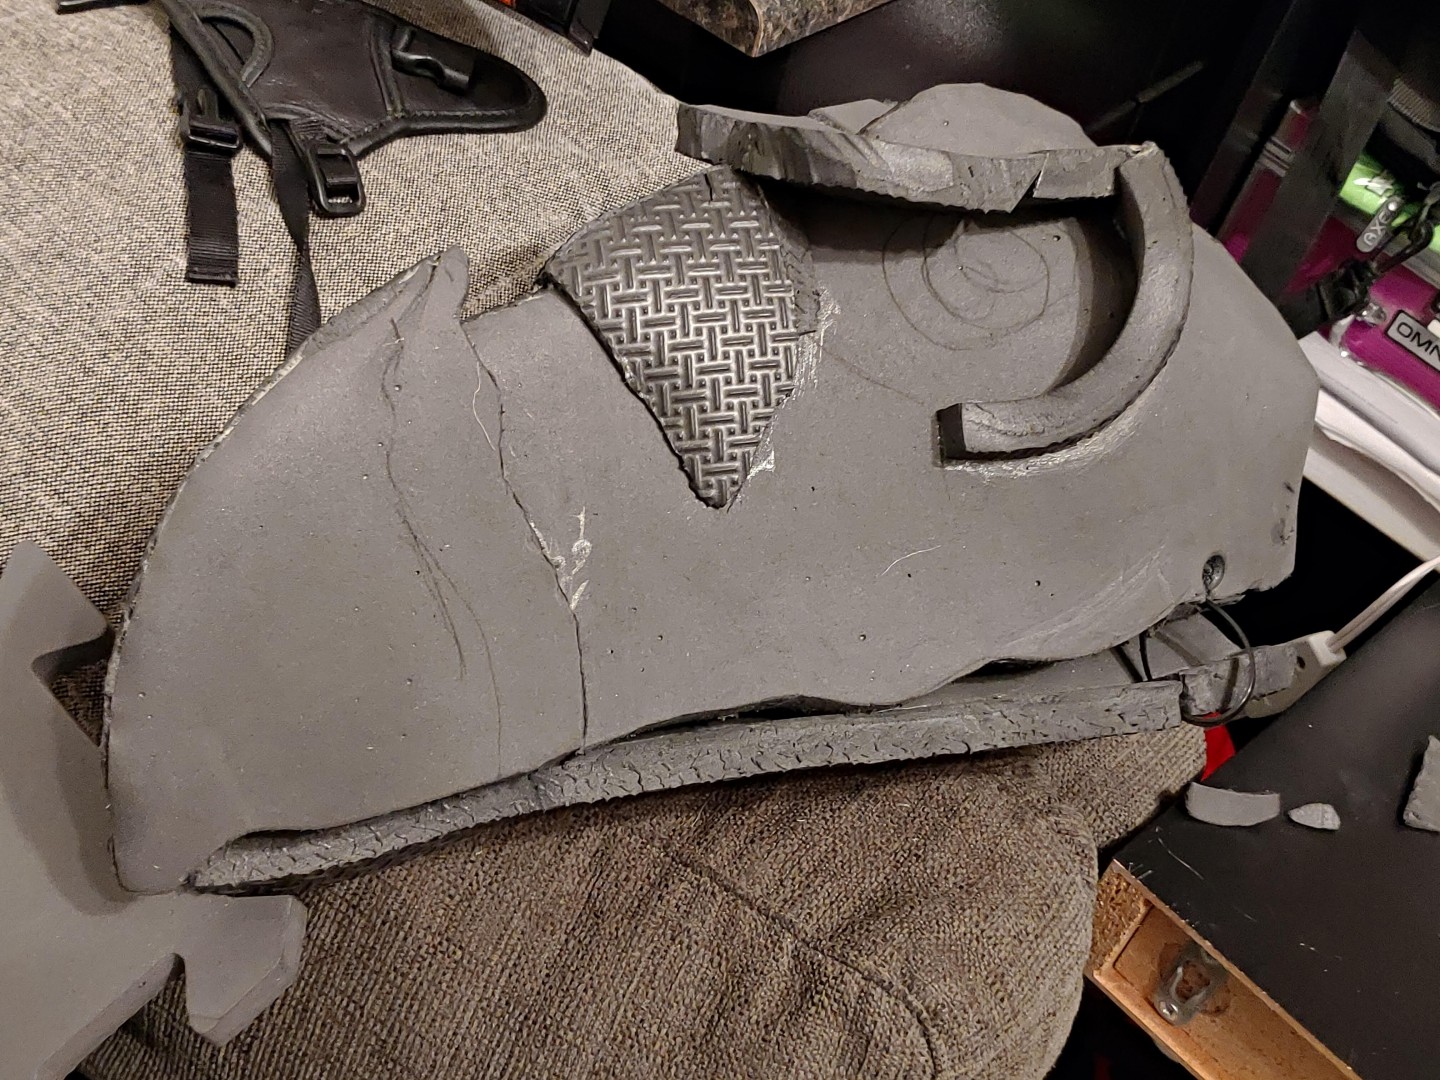
Start with a very basic shape.
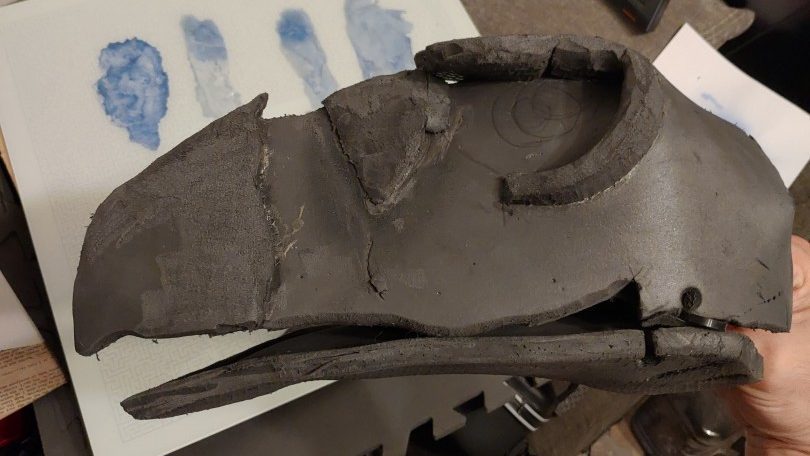
Sand and make adjustments to your shape.
With the heat gun on low, you can heat the foam just a bit for it to hold the shape better and put less strain on the glue seams. If you don't have a heat gun, you can live without it as it's not 100% necessary, but makes the overall job a bit easier, just be careful not to heat the foam too much to where it blistering. This blistering I only found useful when sanding, but you can forgo all the sanding if you don't mess up and end up cutting your patterns the other way around, as I did. That's why all the photos of this part are only on the left side. The right side I did with the pattern showing up.
The Sculpting
This is the fun artistic part. Originally I sanded the surface because I didn't want the pattern to show, but I realized that after covering it with the clay it wouldn't be a problem and was probably unnecessary. Nevertheless, the sanded surface did help the clay stay in place.
Here I made a choice that later would shift the process in a completely different direction.
You see, my idea was to avoid making a mold at all costs. I Highlighted costs because molding materials are expensive and time-consuming (and it's not my strongest skill). So to that end, I looked for a material that was lightweight and foam-like.
After some research online I came across Foam-Mo, a relatively new material sold by https://www.cosplayapprentice.com through their amazon store.
These are a paid links.
Foam-Mo is relatively easy to sculpt, lightweight and inexpensive. At this stage, my idea was to prime it, paint over it, using "latex skin" (thinly laid layers of dry latex) to close the seams and coat it all in latex for texture. Little did I know that I would have to take a different route.
So I started sculpting the foam clay directly on the Eva foam using mostly my fingers, a little bit of water to smooth and soften the clay and some sculpting tools.
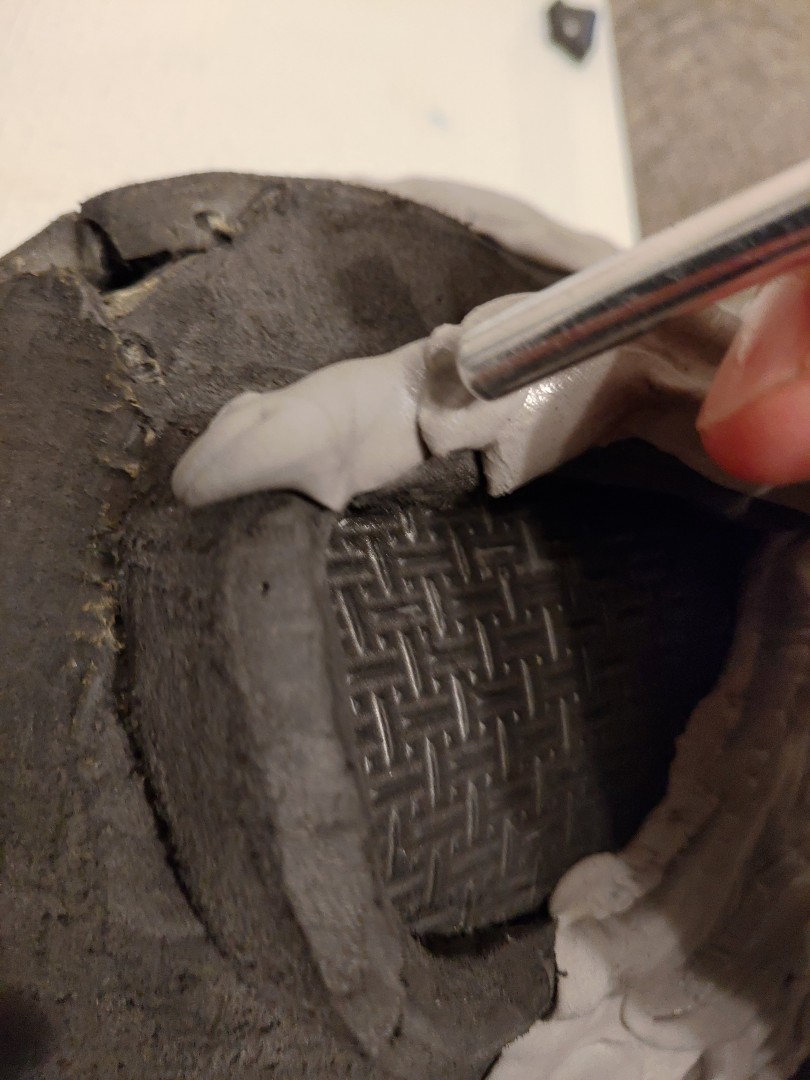
Applying the clay after wetting it. Notice the whole on the foam. That might give you an idea of how rough I was with the original shape. That hole would be patched later with the clay.
One tool I found especially effective was the smooth endpoint of one of my tools, allowing for smoothing and blending with ease.
These are a paid links.
Because of other work, I did not, have a lot of time to work on this, so I sculpted the head on 4 or 5 different stages, leaving my possible seams in places where I imagined would not be very noticeable (especially after the paint job and latex layers, which will effectively hide them). I found out that Foam-Mo seam relatively easy even while waiting some days in between.
I saw videos of people putting it in the freezer to cure, I noticed it had a different effect. It locks the moisture in so when it unthaws you can rework it a bit and it was easier to blend the edges of the different stages.
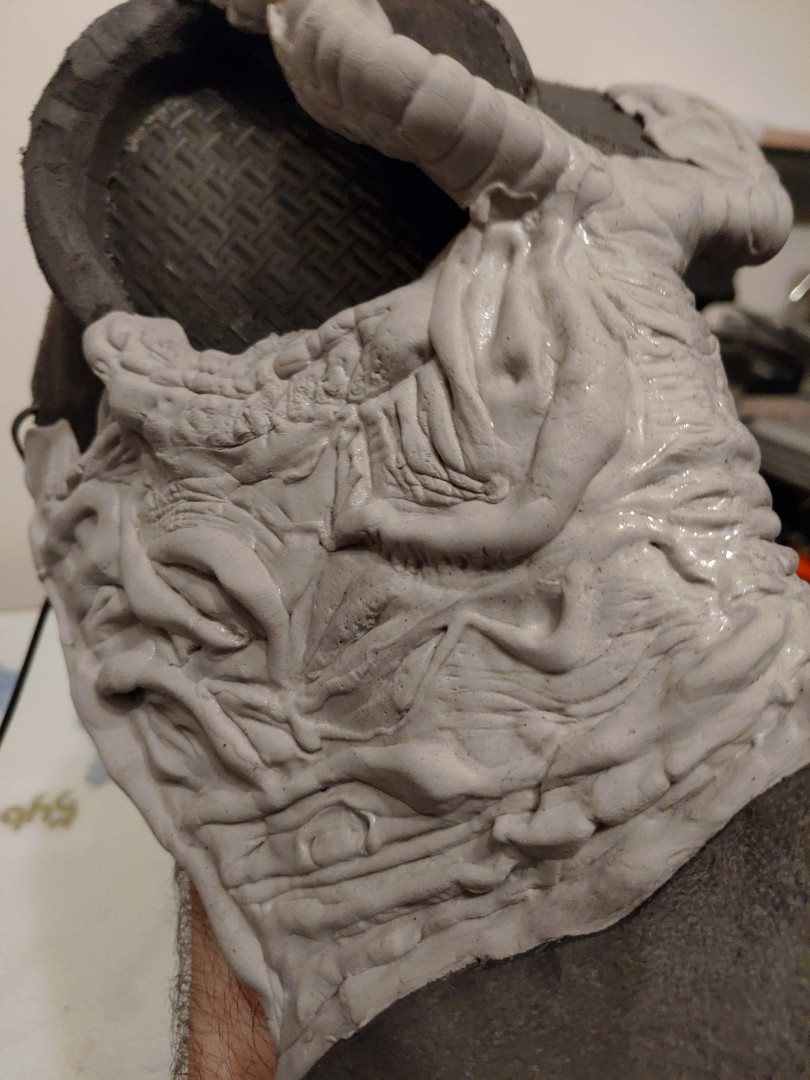
At this point, I found something to my dismay: Unfortunately, I did not account for something that Foam-Mo does. It shrinks as it dries.
This meant that some of the detail was reduced. if you go this way, remember to exaggerate your features.
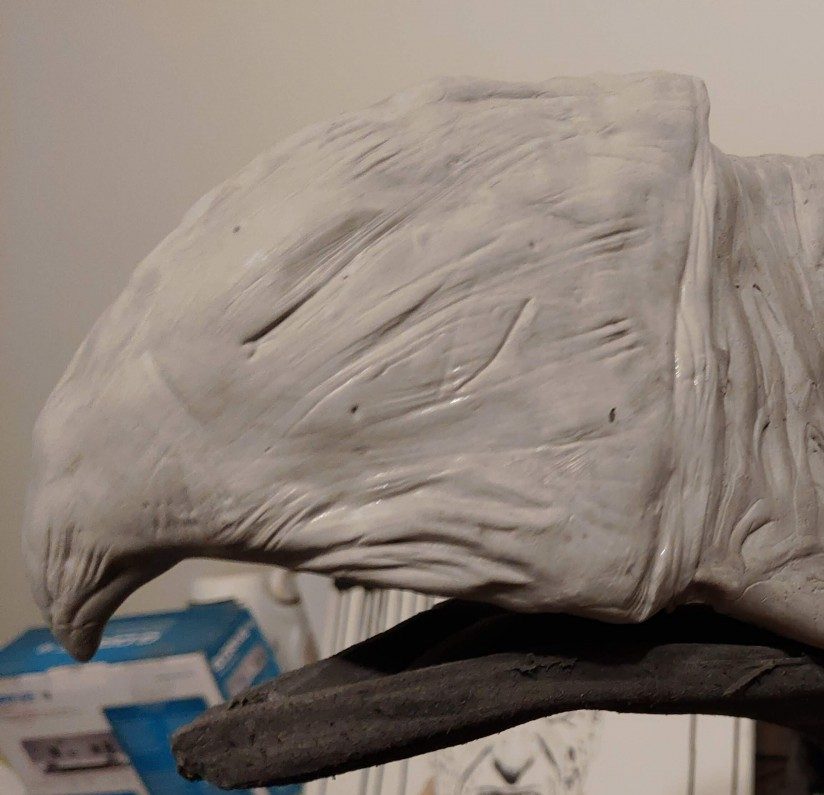
Before drying
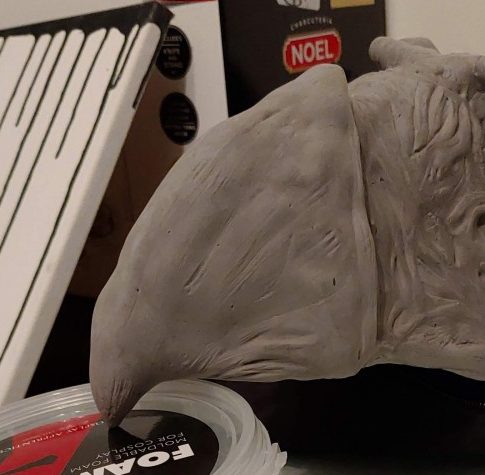
After Curing. This only got worse as time passed.
I ended up making it work due to an idea I was throwing around.
You see, there are multiple versions of the skeksis. First you have the old ones vs the new ones.
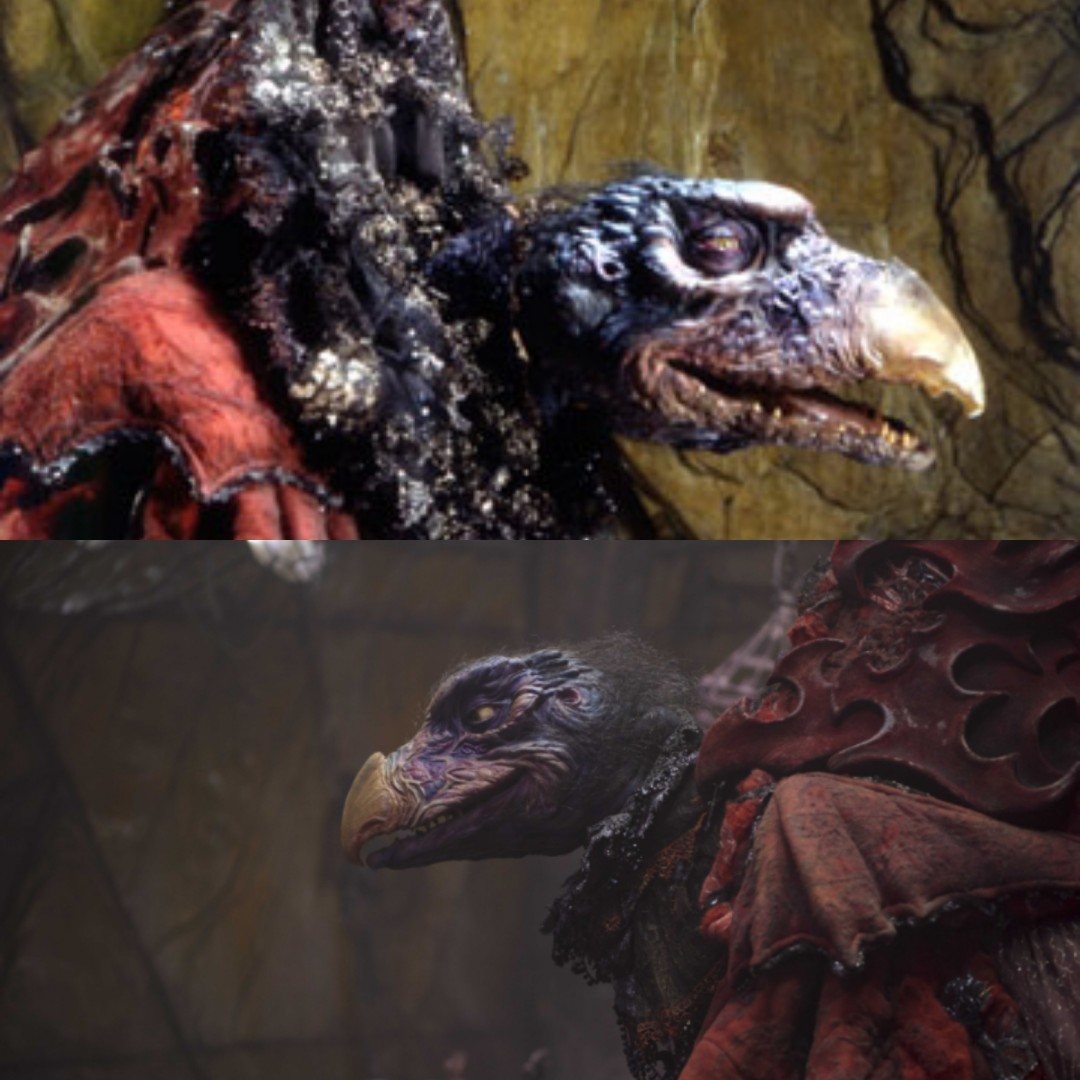
And even through the movie, I believe different heads were used for close up hero shots and wider general shots. Also, according to sources, the original heads deteriorated during the shooting to the point they were crumbling:
The banquet scene was the last to be filmed, and the puppeteers used it as an opportunity to let off steam after months of shooting: while at first the Skeksis puppets were treated with velvet gloves, in this scene they were freely dirtied with rancid noodles and drenched in water, as the latex skin was at that point already crumbling
So I decided to mix a bit of the two styles, one side based on the newer puppet and the other one on the old one, with more decay. And of course, a free interpretation, even though I heavily referenced the originals. This helps me work over the limitations and the vast differences from one photo to another.
I made holes for the eyes, inserted Styrofoam balls from the crafts section of the dollar store in the sockets from the inside and finished sculpting the rest of the head.
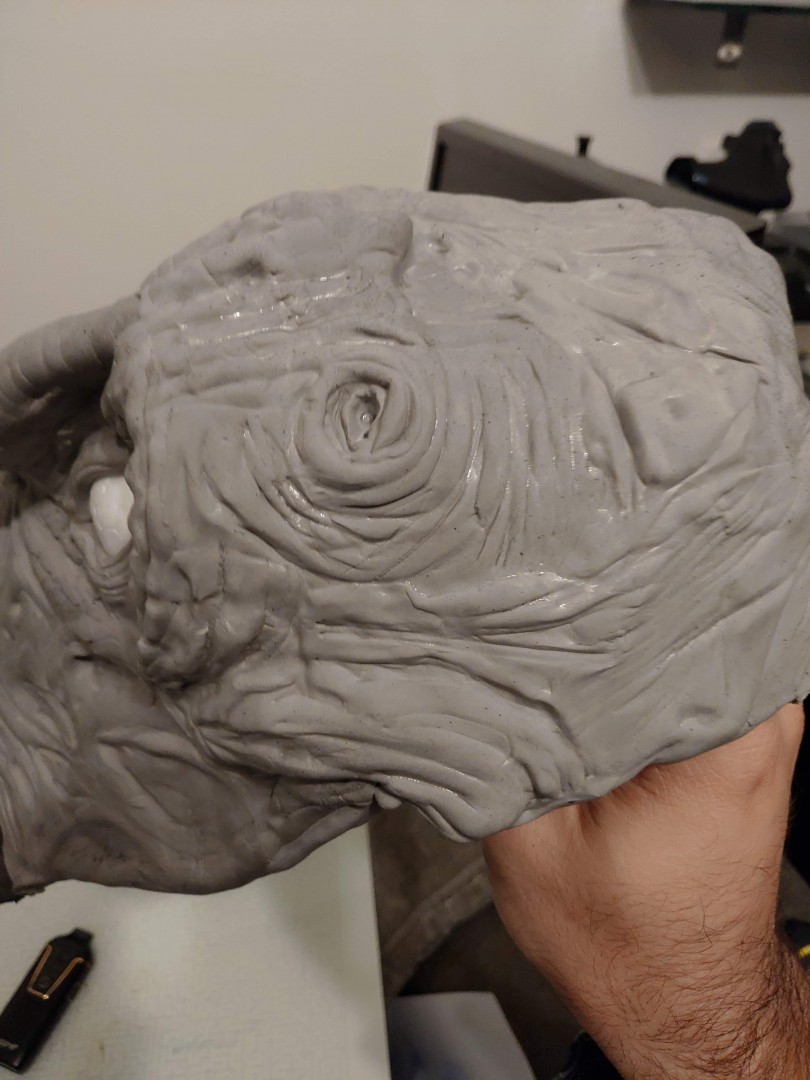
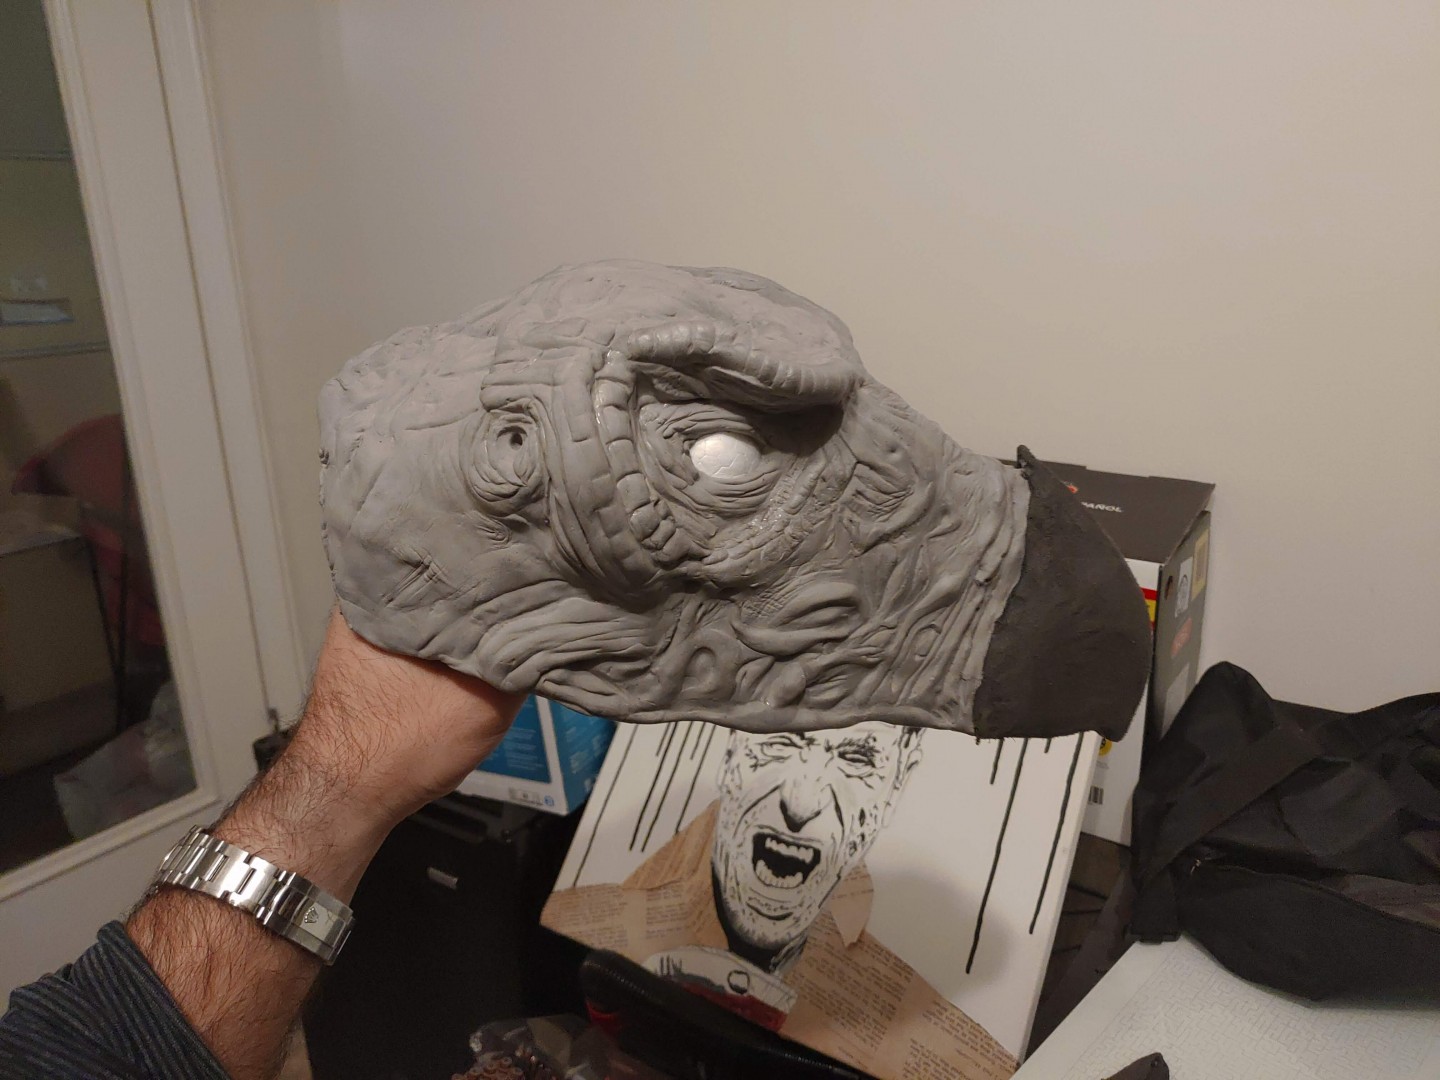
Another issue with the clay foam is that while thick parts retained most of its flexibility, thinner parts become extremely brittle and break off.
So two things were happening at this point:
• I was starting to lose detail.
• I realized, as this was made to entertain my toddler daughter, chances were it will get irreparably damaged given it was not as flexible as I thought it would be.
It was time to secure the piece by making a mold and casting it on a material that would be more suitable.

